Thursday, June 26, 2014

Strudel, but not for your toaster.

The finished dish.
As Germany slowly beat the USA soccer team into a scoreless trance, I am reminded that I never posted our main course from our Austrian dinner a month or so back.  Normally I would just move on, but this was so good and such an unusual and fun thing to make that I have to post it.  The steps are pretty basic: you make a mousse out of chicken breast and cream in a food processor, you blanch some cabbage leaves, you wrap the cabbage leaves around uncooked chicken breast, spoon a generous dollop of the mousse on top, then wrap in phyllo dough and bake.  As Nigella always says, there's a difference between time consuming and hard, this takes a bit of time but it's not hard.  I served it over a puree of celery root and parsnips, which were boiled in some cream and then pureed with a stick blender and some butter.  But honestly a salad or some sautéed greens or peas would be just great alongside.  Give it a shot when the weather cools down this fall.  And once again, this came from the fantastic cookbook Neue Cuisine by Kurt Gutenbrunner

Cabbage-Wrapped-Chicken Strudel
Ingredients
8 large cabbage leaves (use either green cabbage or Savoy cabbage if you can find it)
5 skinless, boneless chicken breasts
2 ice cubes
2 cups heavy cream
24 frozen phyllo sheets, thawed (if they are the very large sheets, use only 12)
6 tablespoons unsalted butter (clarified, unsalted butter if you have it)
salt
pepper
Preparation
1.  Prepare the cabbage leaves:  bring a large pot of water to boil, add a tablespoon of salt.  Fill a large bowl with ice water.  Add the cabbage leaves 1 or 2 at a time to the boiling water for a couple minutes, then put them in the ice water.  Once all leaves have been blanched, lay them out on some paper towels and pat them dry.  If the center rib of the leaf is really thick, remove it.

2.  Prepare the mousse:  place a medium bowl inside a large bowl filled with ice water.  Cut 1 chicken breast into 1-inch cubes and add to a food processor, season with a 1/2 teaspoon of salt and several grinds of fresh black pepper, then add the ice cubes.  Pulse the processor for at least 30 seconds or until the mixture is well chopped (could be up to a minute depending on your device).  Then, turn the processor on and gradually add the cream through the funnel.  Keep adding the cream until the mixture turns a light pink and has thickened to a mousse.  Scoop the mousse out into the small bowl that is in the large bowl with ice water, or put the bowl in the fridge to keep the mousse from separating.
Finished mousse should look like this, pale pink and thick.
3.  Prepare the phyllo:  If you have very large sheets of phyllo, cut the 12 sheets in half so that you have 24 sheets that are uniform in size.  Stack them and cover them with a damp cloth.

4.  Prepare the chicken strudel:  Preheat the oven to 450 degrees.  Line a baking sheet with parchment.  Take 1 sheet of the phyllo, brush with the melted butter.  Repeat with 5 more sheets, stacking them as you go.
Kevin brushing the cut phyllo sheets with clarified butter.
Then, set one chicken breast in the center of one of the cabbage leaves. Add 3 tablespoons of the mousse on top of the chicken and then wrap the leaf around the breast.  If the leaves are small, just place one under the breast, add the mousse, and then one on top - tucking it around the breast if you can.  Place the wrapped breast about one inch from the side of the stacked, 6 phyllo sheets, leaving a half-inch or so on the top or bottom as well.  Roll the breast and phyllos sheets over several times until the whole thing is wrapped in phyllo.  Tuck in the ends.  Place each strudel on to the parchment-lined pan as you go.
Place the cabbage-wrapped breasts on the stacks and fold over until you reach the end.
5.  Brush the strudels with the melted butter and sprinkle over some salt and pepper.  Put the sheet in the oven and bake 20 minutes.  Take them out and check to make sure the chicken is cooked through by slicing into one of the strudels.  It took me about 25 minutes total, the phyllo should be nice and golden brown as well.  Let cool for a few minutes before serving.
These are ready for the oven.
Note:  The recipe for the mousse is more than enough if you want to do this for 6 or 8 people, just add more phyllo sheets and keep going until you have enough for each person at your table.


Friday, May 30, 2014

Spaetzle!

The finished dish.
Spaetzle, or spatzle, is quintessentially central European, so naturally I had to include it (or some version of it) as part of my culinary trip to Austria for my most recent You Pick Two dinner.  Spaetzle are cooked in a large pan of water brought to a rolling boil and then often sauteed in butter, or the fat of your choice, until lightly brown and crispy on the outside.  Cooked this way, it makes an excellent bed for a meaty or rich stew like a goulash, or as a fantastic starch to soak up any sauce you might find in central European cuisine.  But having already made a modern version of beef stew at my first dinner, and having recently cooked an Italian meal, I thought why not make spaetzle the "pasta" or first course for the Austrian dinner.  I think the guests were glad I did.

Making the spaetzle itself was actually quite fun and confidence boosting.  The basic process is make a dough, let it rest a bit, then press the dough through large holes in a colander to make them rain down into said pan of gently boiling water to cook for a bit.  Then scoop out the cooked dumplings to a large bowl of ice water before draining them in a colander.  Boom.  Done. 

Chef Kurt Gutenbrunner's recipe that I used for this dinner is called "quark spaetzle" - with quark being a creamy to slightly firm cheese found in lots of central and eastern European cooking.  Unfortunately, my Harris Teeter doesn't carry quark, but it does carry many varieties of greek yogurt which the chef recommended as a substitute.  The resulting spaetzle was light with a nice chew.  Frankly, this dish could easily serve as a main course with a salad, or grilled asparagus, or sauteed carrots served alongside.  But these dinners are meant to be over the top, so it served as the first course.

Cooked spaetzle after it has been drained.

Like I said, spaetzle can be served in a variety of ways.  For my dinner, I sauteed mushrooms, brussel sprout leaves, corn and peas in some butter and herbs in a large saute pan before adding a little cream to make a sauce (the recipe is also in the book).  I formed and cooked the spaetzle earlier in the day, adding a couple tablespoons of oil to the drained spaetzle, mixing about, and then chilling them in the fridge.  The spaetzle will keep up to two days in the fridge, if properly covered.  However, you could also just add the spaetzle directly to the sauce after you poach and drain them, if that works better for you.  So, here we go:

Spaetzle with a white corn, brussel sprouts, mushrooms, peas, and tarragon cream sauce*
Serves 4 as a main course, 6 as a first course

Ingredients
1/2 teaspoon salt
several grinds of fresh ground black pepper
2 cups all-purpose flour
1/8 tsp nutmeg, freshly grated
2 large eggs, lightly beaten
1 cup quark cheese (I substituted a 7 oz. container of 2% Fage greek yogurt)
1/3 cup heavy cream

Directions
1.  Bring a large saucepan of salted water to a boil. Meanwhile, in a large bowl, whisk the flour with 1/2 teaspoon of salt, 1/4 teaspoon of pepper, and the nutmeg.
2.  Add the eggs, quark (greek yogurt), and cream and beat until smooth.  It should easily form a large ball of dough, if still dry add a couple tablespoons of cream till it comes together.  Let the dough rest for about 15 minutes before proceeding with the next steps.
3.  Fill a large bowl with ice water. Working in batches, press the dough through a colander with large holes using a rubber spatula into the boiling water.  I ended up using a draining ladle that I had, otherwise use a spaetzle maker.
Pressing the spaetzle dough through my makeshift maker.
 4.  Cook until the spaetzle float to the surface, 2 to 3 minutes. Using a fine sieve, transfer the spaetzle to the ice water for 1 to 2 minutes to cool, then remove to a colander to drain.
5.  Serve with your sauce of choice or saute the drained spaetzle in a couple tablespoons of butter until golden brown.

*Adapted from Neue Cuisine by Kurt Gutenbrunner

Tuesday, April 29, 2014

#5: Café Vienna

The hills were most certainly alive at our latest You Pick Two event.  It was an Austrian-inspired meal in honor of one of our closest friends, Chris Handler.  His nickname is "Dr. Chris," since he holds a doctorate from the University of Pennsylvania in molecular biology.  He currently works as a Senior Vice President at a large public relations firm here in DC where he advises government clients on campaigns related to health care and wellness.  It's ok to feel like a slacker when you read his bio, I sometimes do.  Chris' family is from Austria, although that part of the country where they originate from is now technically in Slovenia.  So I had hoped to remind him of some of the foods he may have eaten or talked about while growing up in Long Island with his extended Austrian family.  Not knowing really anything about this type of cuisine, except for beer and sausages really, I went online to do some research.  I came across a book called Neue Cuisine by chef Kurt Gutenbrunner.  It was perfect.  If you have any interest in this type of food, or are curious about the region and traditions, I highly recommend adding it to your library.  The recipes and stories are beautifully written and presented, and the author adds lots of useful tips and notes about making the dishes ahead or substitutions for hard to find ingredients.  And the precision of the recipes, as you might expect, is super sharp.  I made the recipes exactly as written and had zero issues.  In fact by the end of preparing the meal, I felt suprisingly competent - which can be dangerous.  I started to think an 8-layer torte with a meringue center, several fillings, and a whipped ganache frosting seemed entirely feasible in a day. 

Edelweiss indeed.

The table setting and theme were inspired by a photograph in the book that was taken off the tables outside of Cafe Wallsé, which is one of the author's restaurants in New York.  It had white tablecloths, with hints of black and blue in the napkins and accessories.  I ran with that and had my friend Chuck of the amazing LUSH Arrangements make a fantastic centerpiece for the table.  He thought of "Edelweiss" from The Sound of Music and his arrangement of thistles and wildflowers certainly reflected that inspiration.  Frankly, it was probably my favorite table setting so far for You Pick Two.


From left: Kevin, Chris Handler, Ken Rub, and Andy Scahill

So what about the mystery guests?  Chris put a lot of time into selecting some great guys to bring, and it really showed.  Andy Scahill is a friend of Chris and a professor of film and media studies at Georgetown University.  His attitude was unpretentious, which I was concerned about since my film class professor in undergrad was quite stuffy, and he could talk about any film.  I watched a beyond my years Roman Polansky film in undergrad called The Tenant.  Seriously, look it up, really bizarre (but really good).  It was nice to talk to someone who had actually seen it and could add some insight.   Chris also brought an ex-boyfriend of his named Ken Rub.  Ken's father was a Methodist minister in the South and he went into the army right out of high school to get away and see the world.  After several years in the army and after attending college, Ken went on to become a banker.  He travels the world extensively and is now a managing director at a commercial real estate firm here in DC.  Oh and in his spare time he teaches yoga classes and crossfit.  Despite all the success, he was a very approachable and independent guy that we are sure to be friends with after the dinner.


Matchstick fries.

For the menu, I pushed myself to try several things I have never made before: spatzle and strudel chief among them.  We didn't do a cocktail this time since the meal was so intricate, but I did make some matchstick fries and a mustard dipping sauce to go with our glass of bubbly.  I never really deep fry things, mostly because I am slightly intimidated by it, but I used this Ina recipe and they came out great.  The key was to thinly slice them using a mandoline; I don't think I could have done it by hand.  Here is the menu from the night, the recipes will follow soon:  


MENU

Café Vienna

April 19, 2014
 

Starters
Matchstick fries
Crispy thin-cut potatoes, horseradish-mustard dipping sauce

Landjagger sausage
 Cured German pork & beef sausage
 

First Course
Spätzle
White corn, brussel sprouts, mushrooms, tarragon
cream sauce


Main
Cabbage-wrapped Chicken Strudel
Chicken mousse, phyllo dough, parsnip-celery root puree 

 
Sweet
Sachertorte
Chocolate cake, strawberry preserves, chocolate ganache, whipped cream

 
Guests
Chris Handler
Andy Scahill
Ken Rub

Friday, April 18, 2014

Beans and greens


Growing up a New Englander, I never had anything like Southern food till I came down to Virginia for school and then to DC for my job and as a place to live.  Though I do want to sheepishly point out that I get some southern cred here because I was born in the South.  Baton Rouge, Louisiana in fact.  I lived there for about a year while my Dad was in grad school at LSU, before heading up to Worcester to grow up.

While being a resident of the mid-Atlantic area, I have also made several trips down to Charleston, New Orleans, and Savannah, and have sampled all kinds of Southern cuisine.   What I came to love most were the side dishes - mac and cheese, collards, okra, green beans, etc.  In fact, I honestly could skip the fried meat as a main and order a plate of sides at most places.  Not that I am vegetarian or anything (the veggie sides in the South contain plenty of pork regardless), but I love the slow cooked flavor of low country cooking and that really comes through in the sides.  Legumes, iron-rich leafy vegetables, tough inexpensive cuts of meat - all of them have tons of flavor, but take some time to cook.  That's fine by me, the setup and prep is pretty straightforward and you just have to check on them once in a while they cook.  No other work necessary.  Plus it waits for you, these sides can be kept at room temperature - just warm through before serving.

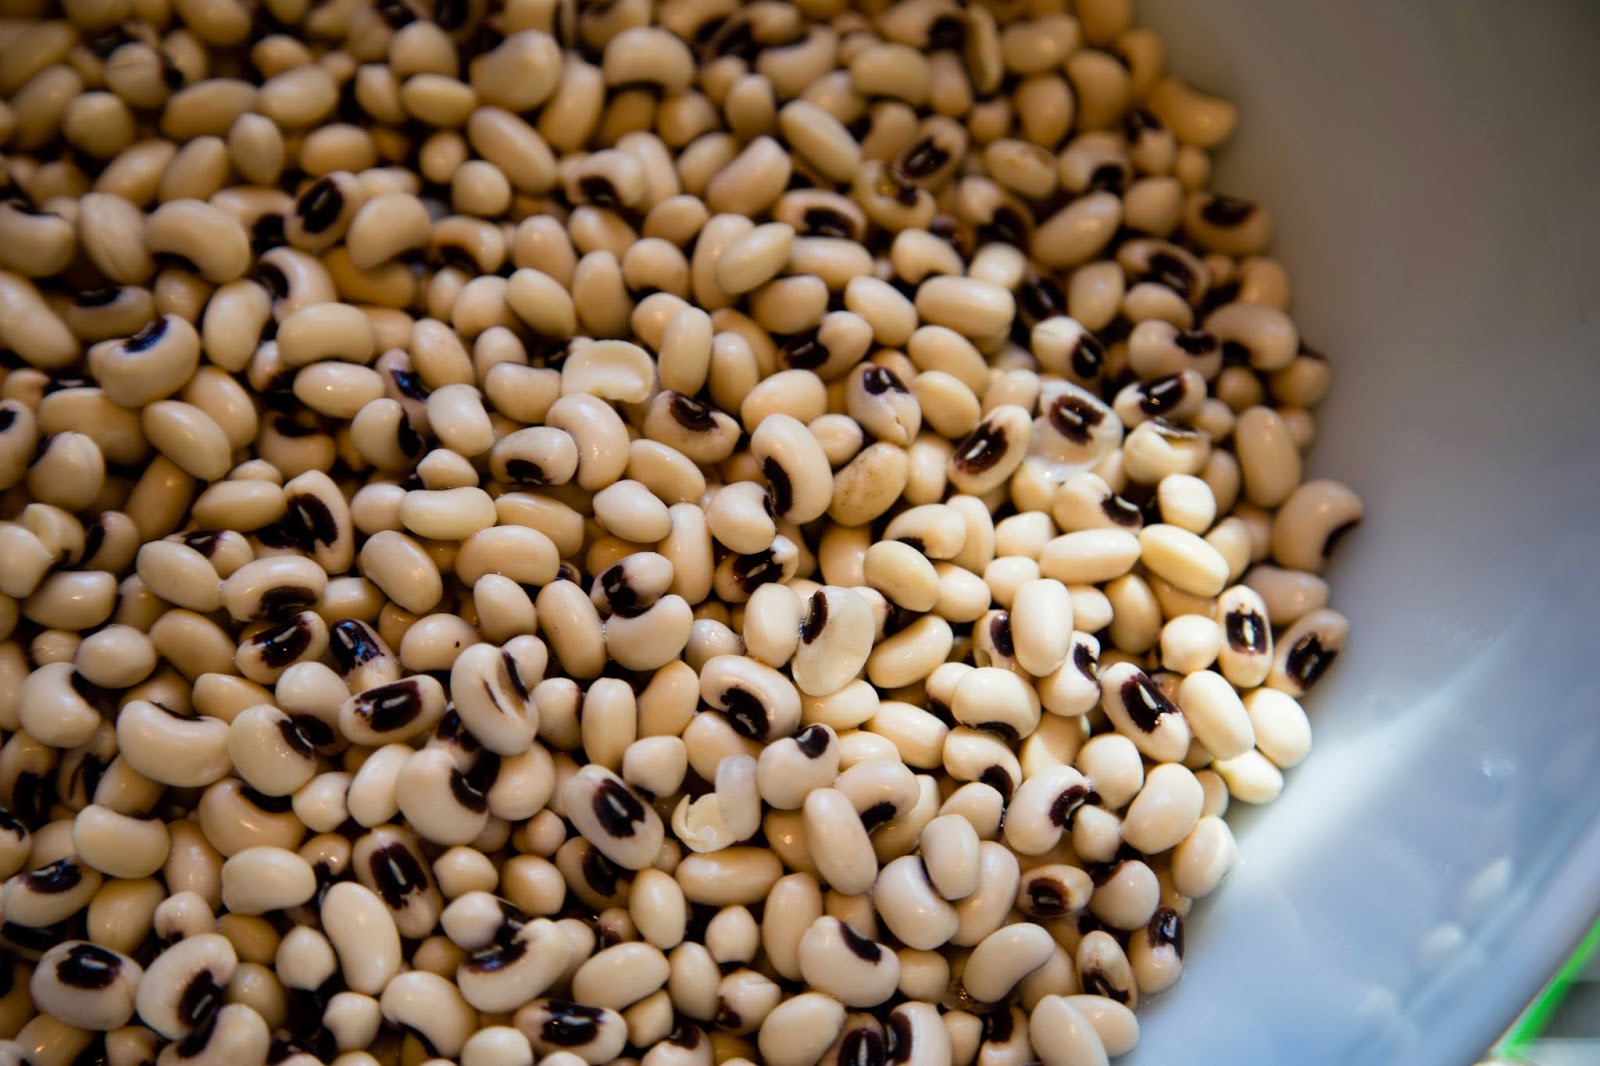
For our Southern dinner, it had to be my two favorites: black-eyed peas and collard greens.  For the peas, it really makes a big difference if you start with dried beans.  Canned is fine, but if you have the time, start with dried beans.  You just need to soak them overnight and then boil them for a bit the next day.  It's not hard, just takes a little time.  You then saute some kielbasa or bacon in a large dutch oven with some aromatics, add the cook peas and a little seasoning, and you are good to go.


I used organic collard greens here because I feel better when I use organic vegetables.  But use whatever you can find.  And the key to the collard greens, for me, is the acidity of red wine or cider vinegar.  I find that my taste buds are normally completely overwhelmed by very vinegary items like pickles or salt and vinegar potato chips, but here in the greens, the acidity mellows while it cooks and serves as a great counterpoint to the earthy richness of the greens.  All greens are cooked with some kind of ham product as well.  Traditionally, based on my research, it's smoked ham hocks.  I couldn't find them at my local store so instead I used a smoked ham steak that I diced into cubes.  It worked great.  You could also use good quality deli ham as well, sliced thickly.  Or you could skip the ham and go the meatless route, but I feel then you lose some of that traditional flavor.

The one thing I did try to lose was some of the heaviness or greasiness of the sides I have found at some Southern restaurants.  I think these restaurants use fat and salt to mask poor quality ingredients.  The recipes below are still packed with lots of flavor but taste lighter and fresh.  And, these sides only get better the more they sit - so they are perfect for making ahead and keeping in the fridge.  Just reheat them before your dinner.  Enjoy!


Black-eyed peas
Ingredients
2 cups dried black-eyed peas, soaked overnight
1 large sweet onion, diced
1 red bell pepper, diced
1 lb. pork kielbasa, casings removed if you can
2 bay leaves
2 tablespoons butter
1 tablespoon olive oil
1/4 teaspoon cayenne pepper
1 teaspoon kosher salt
1/2 teaspoon ground black pepper
1 teaspoon granulated white sugar
1 teaspoon garlic powder
1 to 1 1/2 cups chicken stock

Directions
1. Soak the beans overnight in a large bowl.  Drain the beans and add to a large saucepan.  Add water to cover the beans by about an inch.  Throw in the bay leaves.  Bring the pan to a boil, lower to a simmer and partially cover.  Cook the beans for about 20-30 minutes, they will still be on the firmer side.  Drain and rinse the beans, keep the bay leaves.

2. Heat a 5-7 quart dutch oven over medium heat for several minutes.  Add the butter and the oil.  When butter has melted, crumble in the pork kielbasa.  If you can't remove the skins, dice the whole kielbasa into small cubes.  Brown and render the fat out of the sausage for several minutes, stirring occasionally.  Remove the kielbasa.

3. Add the diced onion, diced pepper, 1/2 teaspoon of salt, pepper, garlic powder, cayenne, and sugar.  Saute and sweat out the veggies for about 8-10 minutes.  Add the kielbasa and drained beans to the pan now.

4. Add the chicken stock so that it barely comes up to the top of the bean mixture.  Bring to a boil and then partially cover and cook for about 45 minutes to an hour, until the beans are very tender but not mushy.  Let cool slightly before serving.


 Collard greens
Ingredients
2 tablespoons olive oil
1 tablespoon butter 
1 large onion, diced 
4 cloves garlic, minced 
1 to 1 1/2 cups chopped smoked ham 
3-4 cups chicken stock 
3 teaspoons red wine (or cider) vinegar 
5 bunches of organic collards (about 2 pounds total) or two 16oz bags chopped collards 
1-2 teaspoons of kosher salt 
freshly ground pepper to taste

Directions
1. Wash and de-stem each collard leaf.  Stack all the leaves on top of each other and cut them crosswise into 1 inch strips.

2. In a large dutch oven, heat the olive oil and butter over medium heat. Add the diced onion and saute for 5 minutes, or until translucent. Add the minced garlic and saute for another minute or two.

3. Add the diced ham and/or ham hocks if you have them.  Saute for several minutes with the vegetables and fat in the pan.  Add the collards, tamping down with a wooden spoon to get all of the greens in the pot.  Season with one teaspoon of salt and several grinds of fresh pepper.

4. After the greens have wilted, add the stock and the vinegar.  You want there to be enough stock or liquid to just barely cover the greens.  Bring to a boil and then partially cover and simmer for 1 to 1 1/2 hours.

5. When the greens are really tender and their greenness has dulled to a browner shade, they are done.  Make sure to taste for seasoning.  Add another 1/2 to 1 teaspoon of salt if it needs it and several grinds of fresh black pepper.

Tuesday, March 25, 2014

#4: Southern Traditions


Last weekend we hosted our fourth You Pick Two event.  We invited a good friend of ours, Chris Keller.  He is co-owner of a salon on U St. in DC called Parlour.  I admire him for the risk he took in starting his own business.  I hope to someday strike out and start up my own business, but it's a scary thing to go out on your own like that.  He and his business partner Rebecca have established a thriving business in a bustling part of town.  Chris is also a close friend of mine and we have been through a lot together over the past decade or so.

Chris brought his boyfriend, Tyler Mains.  He's a young artist who is a visual manager at Bloomingdales in Chevy Chase, MD.  I was with Chris when he met Tyler last year during DC's Gay Pride event.  You could tell from how they chatted that it was a good match. He's very talented and has been able to make a living in the art world, which is not easy.  They have been dating almost a year now and I am very happy for both of them.  Tyler brought two friends and co-workers from Bloomingdales, Gail Viraldo and Adebimpe Abanishe.  They were both very nice people and a pleasure to have over for dinner.  Gayle is a cook herself so I was very happy that she enjoyed the meal.

Hummingbird cake.
For food, I wanted to choose something that Chris would enjoy.  Chris, for lack of a better word, eats terribly.  That's a little harsh, but somewhat true.  He loves rich food and can make some of the best midnight nachos, purely from things you can find at any CVS.  He's also very thin, which is not fair if you ask me.  He came by for dinner several years ago and Kevin made one of his favorites dishes, Chicken and Peaches; it involves butter, canned peaches, and Bisquick.  Chris loved it.  Kevin is from the south so I wanted to play on that and I decided to do a traditional southern meal. 

After talking with Kevin, I thought because it is the south, I had to do something fried.  I've made fried chicken before but it just that didn't seem special enough for this - so I made chicken fried steak with sausage gravy.  It was very rich and incredibly good.  The sides consisted of southern staples black-eyed peas and collard greens, both modernized a little bit.  And to top it all off I made a hummingbird cake.  Red velvet is a little more expected, so I wanted to branch out and try something else.  Hummingbird cake is called that (supposedly) because it is so sweet that it could attract hummingbirds.  This one was sweet, but fantastic.  I will be posting the recipes from the menu below over the next couple weeks. 


MENU

Southern Traditions

March 15, 2014


Cocktail
Orange Mint Julep
Bulleit bourbon, orange bitters, simple syrup

Starter
Cheese Wafers
Cheddar cheese, salted butter, cayenne


Main
Chicken Fried Steak
Bottom round steak cutlet, sausage gravy


Sides
Collard greens
Organic greens, smoked ham, red wine vinegar

Black-eyed peas
Pork kielbasa, aromatic vegetables, chicken stock


Sweet
Hummingbird cake
Three-layer cake, cream cheese frosting, toasted pecans


Guests
Chris Keller
Tyler Mains
Gail Viraldo
Adebimpe Abanishe


Friday, March 14, 2014

Pasta time


I have to confess something: there is nothing I love more than a fantastic pasta dish.  In particular, a handmade, fresh pasta dish.  So for my tribute to our trip to Italy, I wanted to make a fresh pasta in a shape native to the region and with a sauce you would find there.  Using Lidia's book as a guide, I found something that I think everyone agreed was their favorite course of the meal.  The shape native to Umbria is called strangozzi.  It's basically like a thicker, shorter linguine or spaghetti (or a shorter fettuccine basically).  What's really interesting about the dough is that it has no eggs.  Zero.  I have only made pasta a couple times, but each time it required an egg.  And contrary to what you may think, the pasta was light with great chew and did a fantastic job complementing the herby, tomatoy, bacony sauce.

Fresh marjoram
The  key for the sauce, I have to say, was the fresh marjoram.  It gave that kind of other wordly, unique edge that I was looking for - it reminded me a lot of the food we ate while in Italy.  If you can't find fresh marjoram, then substitute with dried, but only use about half as much.  I started the sauce earlier in the day and just let it simmer for a while.  Making the pasta takes a little time, but it's not hard.  You kind of develop a knack for it as you hand roll and cut the strangozzi.  Kevin and I did it together and it was just a nice way to spend an afternoon.  PLEASE try this.  I can't speak highly enough about it.

Strangozzi with Tomato Bacon Sauce

Strangozzi
Ingredients
1 3/4 cups all-purpose flour (or double 00 if you have it), plus more for working the dough
1 3/4 cups fine semolina flour, plus more for working the dough
1/2 teaspoon kosher salt
1 1/4 cups ice water, plus more as needed


Directions
1.  In the bowl of a food processor, place the flour and salt, cover it with the top.  Pulse a few times to blend and aerate the dough.
2.  With the motor running, slowly add the ice water through the funnel.  The dough is ready when it begins to gather around the blade.  It will be slightly sticky to touch.  It should form a ball easily.  Add more flour or water (if it is too wet or dry) as necessary.
3.  Dump the dough onto a lightly floured surface, knead by hand a few times until it's smooth, soft, and stretchy.  Nigella once said it should feel like a baby's bottom - and she's right it kind of does.  Form it into a disk, wrap in plastic wrap, and let rest for about a half hour at room temperature.  You can refrigerate it up to a day or freeze up to a month.
4.  Cut the dough into six equal pieces.  I cut the disk in half, then cut each half into thirds, with a lightly floured bench scraper.
5.  Using a pasta roller (I use and recommend the pasta roller attachment for the Kitchenaid mixer), began to roll out each piece.  Pass each section through "1" setting two times.  Then pass each one through the "2" setting once, and the "3" setting once.  That should do it.  If using a different roller, then you want to end up with the sheets about 1/8" thick.  Place each strip on a lightly floured surface or a sheet pan and cover each one loosely with a kitchen towel.  Let them dry out under the towel for about 20-30 minutes.
6.  Now it's time to form the strangozzi.  Lay a strip in front of you, trim the edges to make it an even-ish rectangle of sorts.  Roll up the sheet from the short side, almost like forming like a jelly roll.  If your machine forms wider strips, you would then roll up from both ends and meet in the middle, forming a long scroll of sorts.
7.  With a sharp and lightly floured knife, cut the jelly roll into pieces at a 1/4" interval.  Once done cutting a roll into pieces, using your floured hands, shake out the rolls so that they become long strands.  Place the cut strangozzi into six nests or piles (one for each sheet of dough) on a floured half sheet pan.  Cover with a kitchen towel and let rest for about another 10 minutes.
 8.  Bring a large pot of water to a rolling boil.  Cook two nests at a time: place both nests in the boiling water and stir gently.  When they are done they will float to the top.  It only takes a few minutes (5 minutes at most), be patient.  Scoop the cooked strangozzi out of the water using a strainer or wire spider and put them into a waiting, large skillet that has 2 cups of heated tomato bacon sauce (recipe below).  Toss everything together over low heat and serve in warm bowls with a drizzle of extra virgin olive oil and some chopped fresh parsley.

Tomato Bacon Sauce
Ingredients
1 medium onion, roughly chopped
1 medium carrot, roughly chopped
1 medium stalk celery, roughly chopped
4 garlic cloves, peeled
4 slices of thick cut bacon, diced
3 tablespoons of olive oil
two 28-oz cans of San Marzano tomatoes, crushed by hand
3 tablespoons loosely packed fresh marjoram, chopped finely
1/2 teaspoon of red pepper flakes (peperoncino)
1 teaspoon of kosher salt

Hand crushed San Marzano plum tomatoes
Directions
1. Place the onion, carrot, celery, and garlic in a food processor, cover, and process until finely minced.
2. Heat a large dutch oven over medium heat for a few minutes.  Pour in the oil and then add the bacon slices.  Cook the bacon, stirring occasionally, until all their fat has been rendered.
3. Add the minced vegetables and stir everything together.  Cook out the liquid in the vegetables over medium heat for about 6-8 minutes.  Sprinkle in the peperoncino.
4. Once the vegetables start to stick to the bottom of the pan, add the crushed tomatoes, their juices, the marjoram, and the salt.  Bring to a boil over medium heat, then reduce heat to maintain a steady simmer.  Cook the sauce, uncovered, for 30-45 minutes.  You want a lot of the water to evaporate and to make a sauce that will cling to the pasta well (basically the consistency of a jarred marinara sauce).


Monday, March 10, 2014

Cocktail and aperitivo


We have sort hit on a tradition that our cocktail for these events includes bubbly in some way, in this case it was prosecco.  This cocktail came from Martha Stewart and was very easy to make - it tasted like a very sophisticated and light ginger ale.  Delicious. You basically make a 1-to-1 ratio simple syrup and let it steep with some diced or finely sliced ginger root for about 15 minutes.  Chill the syrup overnight and add a few tablespoons of it to a slim highball or champage flute and fill the rest with bubbly.  Trust me, these will go down quickly.

Zenzero frizzante ("Sparkling Ginger")
Ingredients
(makes about 6 drinks)
1 bottle of prosecco or sparkling wine of your choice (something dry and not sweet)
1 cup of sugar
1 cup of water
2 inch piece of ginger root finely diced or sliced (no need to peel)

Directions
1. Put the sugar and water in a small saucepan over medium heat.  Stir to dissolve the sugar.  Bring almost to a boil.
2. Once solution almost comes to a boil (you will see small bubbles around the edges of the pan), throw in the sliced ginger, turn off the heat, and cover.  Let the ginger steep for about 15-20 minutes.
3. Pour the mixture through a sieve into a measuring cup or glass to strain out the ginger.  Let it sit in the fridge, covered, overnight.
4. Add 3-4 tablespoons of the chilled syrup to a tom collins glass or large champagne flute, fill the rest of the glass with chilled prosecco.

Umbrian lentils
To go along with the cocktail, I served a crostini topped with a tomato-lentil mixture.  It came from the Lidia book I mentioned in the previous post.  I think it's a good idea for a dinner party where you are having guests that you don't know that well to make an appetizer or first course that can sit out at room temperature for a while since you never know if the guests will be late.  In this case, our guests were quite late so it worked out great.  I made the lentil topping in the morning and just re-heated it right before the guests arrived.  In fact, you could make this a few days ahead.  The night of the dinner, slice up a baguette, drizzle a little olive oil over the toasts, and then generously top with the lentil mixture. Easy. I used Umbrian lentils I ordered off Amazon, but any lentil that holds its shape when cooked (such as french puy or green lentils) would work here as well.  I would not use red lentils.  I loved this recipe and would definitely make this again in the future.


Crostini con lenticchie ("Crostini with lentils")
Ingredients
1 cup small lentils
2 medium stalks celery, with leaves, finely chopped
1 medium onion, chopped (about 1 cup)
2 garlic cloves, finely sliced or chopped
2 bay leaves, preferably fresh
2 cups of canned whole tomatoes, drained and crushed by hand (San Marzano are the best, reserve the liquid for another use) – 2 cups was basically all the tomatoes in one 28 oz. can.
2 teaspoons kosher salt
¼ teaspoon of red pepper flakes (pepperoncino)
6 tablespoons of extra virgin olive oil
1 medium baguette, cut into ½ inch thick slices (approximately 10-12 slices total)
2 tablespoons grated parmesan cheese
2 tablespoons chopped fresh parsley, optional

Directions
1. Rinse and drain the lentils. Place the lentils in a 3-quart saucepan with the chopped celery and bay leaves, add 3 cups of water. Bring to a boil, reduce heat, cover and simmer until lentils are mostly cooked (about 20 minutes).
2. Meanwhile, heat a large skillet over medium heat for several minutes, when hot, add 4 tablespoons of olive oil, the chopped onion, and the garlic. Sprinkle the onion with a pinch of salt to prevent it from browning. Saute for 5 minutes, or until the onion is translucent. Add the pepper flakes, crushed tomatoes, and a teaspoon of salt. Bring to a simmer and cook uncovered for about 10 minutes; the sauce should be noticeably thicker, if not, continue to cook it for another few minutes.

The sauce cooking separately from the lentils.
3. Add the tomato sauce to the mostly cooked lentils in their saucepan. Stir to combine. Return the sauce to a simmer and cook partially covered until the lentils are done, about another 10 minutes. Remove the cover, add a teaspoon of salt, and continue to cook until lentils are very tender and all liquid has evaporated.
4. Meanwhile, preheat the oven to 400 degrees. Put the baguette slices on a large baking sheet. Put the pan in the oven and cook for about 7-8 minutes. Remove pan and turn the slices over, put the pan back in the oven, and cook for another five minutes or so – basically until the slices have browned nicely. You could also broil the slices for a couple minutes on each side, making sure not to burn them.
5. Drizzle each cooked toast with a little bit of extra virgin olive oil (approximately 2 tablespoons total). Scoop the cooked lentil mixture onto the crostini generously. The topping is best when served warm or hot. Sprinkle a little parmesan cheese and chopped parsley over each crostini, if you feel like it, and serve.